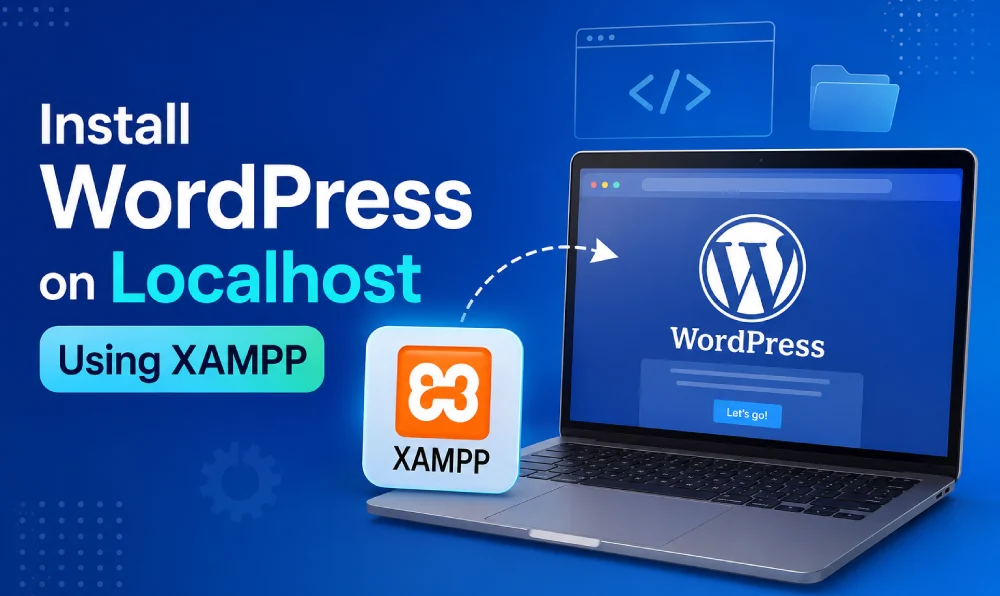

If you’re building or testing a WordPress site, you don’t need to buy hosting just to try things out. You can run a full working copy of WordPress on localhost, meaning your own computer, using a free tool called XAMPP. It only takes about fifteen minutes to set up, and once it’s running you can install themes, test plugins, and break things without any risk to a live site.
This guide walks through the whole process from downloading XAMPP to logging into your new WordPress dashboard.
Why set up WordPress locally first
A local install gives you a private sandbox. You can try out a new plugin, test a theme change, or just learn how WordPress works, all without worrying about visitors seeing a half finished page or a plugin conflict taking your real site down. It also doesn’t cost anything and works without an internet connection once everything is installed.
- A Windows, Mac, or Linux computer
- About 15 minutes
- The XAMPP installer
- The latest WordPress zip file
Step 1: Download and install XAMPP
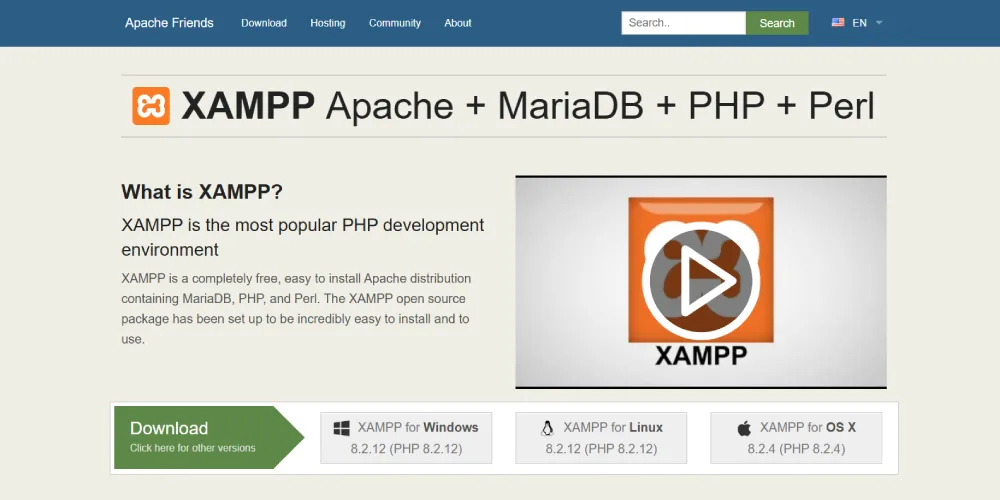
Step 1: Download and install XAMPP
Go to the Apache Friends website and download the version of XAMPP for your operating system.
Run the setup wizard
Once it’s downloaded, run the installer. The setup wizard will open. Click Next on the welcome screen, then you’ll see a list of components to install (Apache, MySQL, PHP, phpMyAdmin, and a few others). The default selection works fine for WordPress, so just click Next again.
Choose your installation folder
Next, you’ll be asked to choose an installation folder. The default location (C:\xampp on Windows) is fine unless you have a specific reason to change it. Click Next and let the installer finish.
Step 2: Start Apache and MySQL
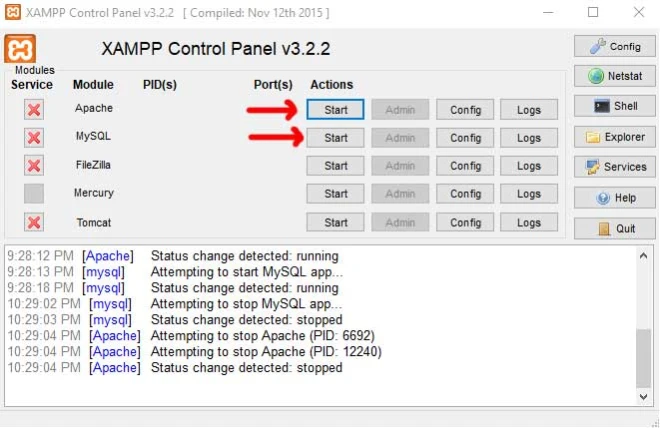
Open the XAMPP Control Panel. You’ll see a list of modules with Start buttons next to each one. Click Start next to both Apache and MySQL. These two are the only ones you need for WordPress. Once they turn green, your local server is running.
If Apache won’t start, it’s usually because something else on your computer is already using port 80. Skype is a common culprit. Close it and try again, or change Apache’s port in the XAMPP config if the problem keeps happening.
Step 3: Download WordPress
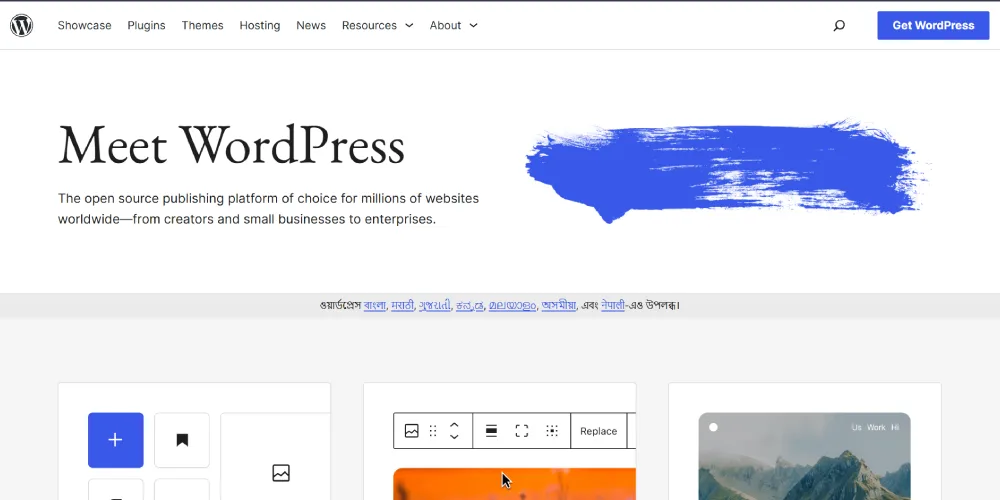
Go to the WordPress.org and click the Get WordPress button. This downloads a zip file with everything you need.
Step 4: Move the WordPress files into htdocs
Extract the zip file you just downloaded. Inside, you’ll find a folder called wordpress. Copy that folder and paste it into your XAMPP htdocs folder, which by default is at C:\xampp\htdocs.
You can rename the folder to whatever you want your local site to be called, this will also become part of the local URL you use to access it, like localhost/mysite.
Step 5: Create a database in phpMyAdmin
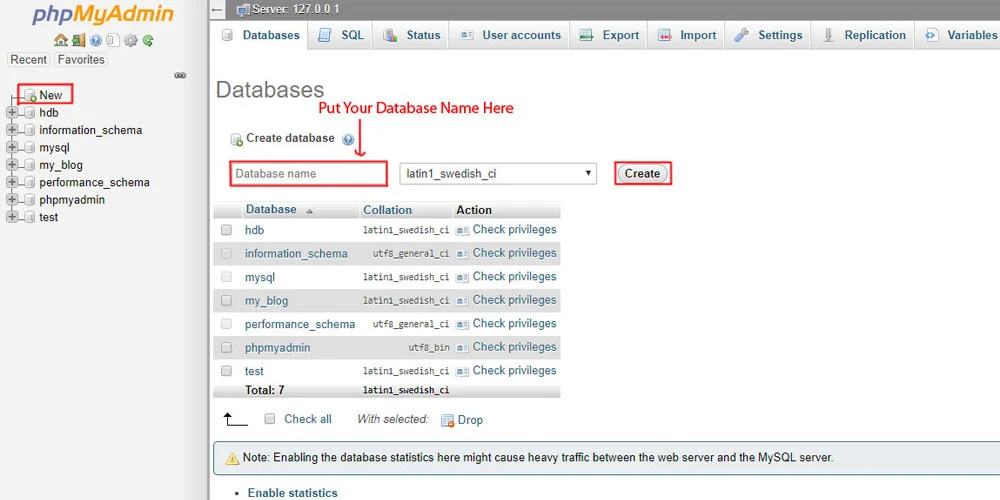
With Apache and MySQL running, open your browser and go to localhost/phpmyadmin. Click New on the left side, give your database a name (something simple like wp_local works fine), and click Create. WordPress needs this database to store all your posts, pages, and settings.
Step 6: Run the WordPress installer
Now go to localhost/wordpress (or whatever you named your folder) in your browser. This starts the WordPress installation screen.
Select your language
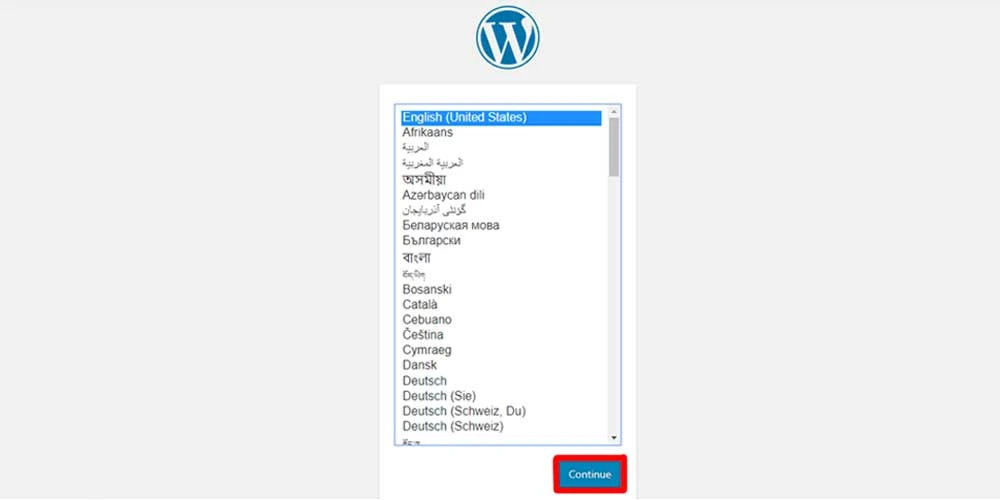
First, pick your language and click Continue.
Click Let's go
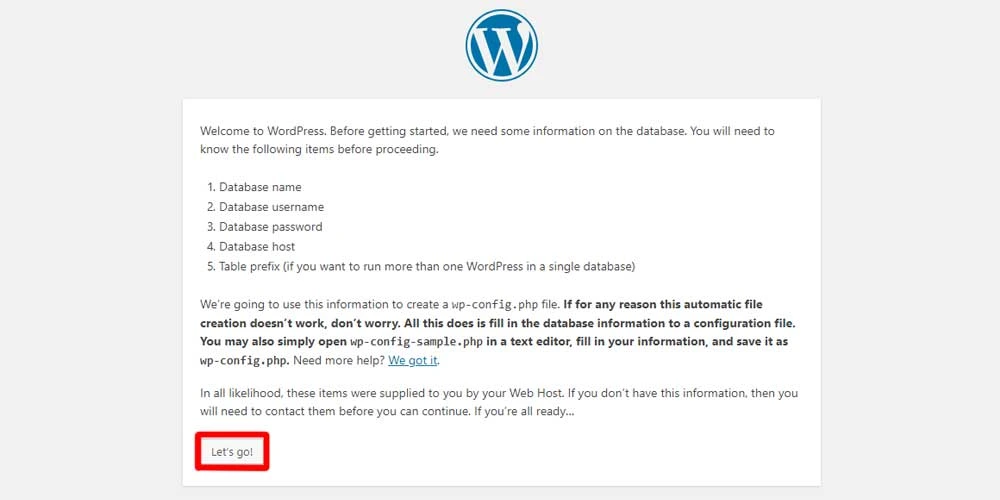
You’ll then see a welcome screen listing what WordPress needs: database name, username, password, and host. Click Let’s go.
Enter your database details
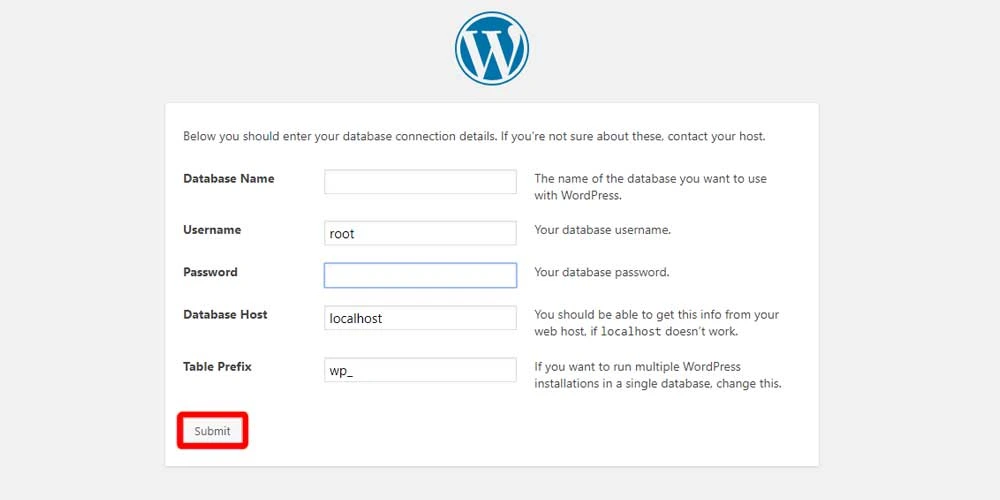
On the next screen, enter the database name you created in Step 5. For the username, type root. Leave the password field blank, this is the default XAMPP setup for local databases and it’s normal, it’s only a risk on a live server, not on your own computer. Leave the database host as localhost and the table prefix as wp_. Click Submit.
If everything connects properly, you’ll see a message saying WordPress can communicate with your database. Click Run the installation.
Step 7: Set up your site details
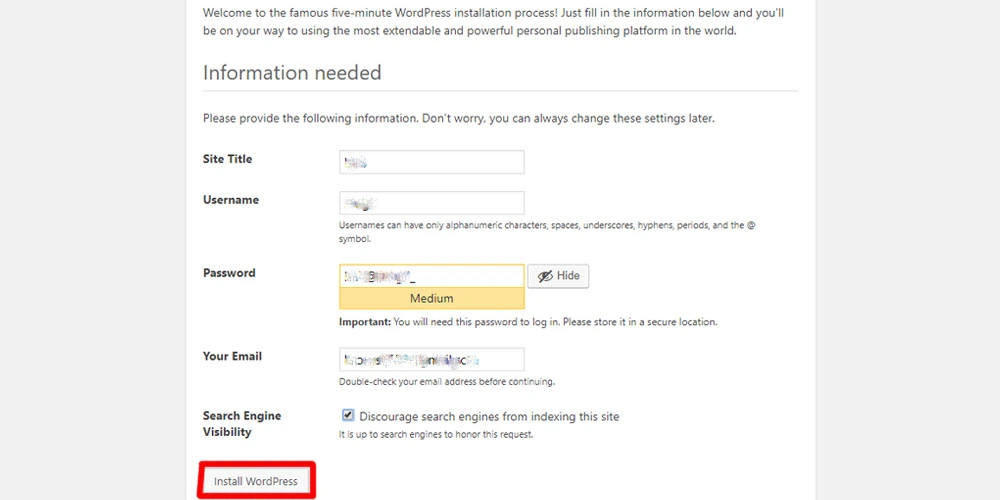
You’ll now be asked to fill in your site title, choose a username and password for your WordPress admin account, and enter an email address. Double check the password, you’ll need it to log in. When you’re done, click Install WordPress.
Step 8: Log in to your new WordPress site
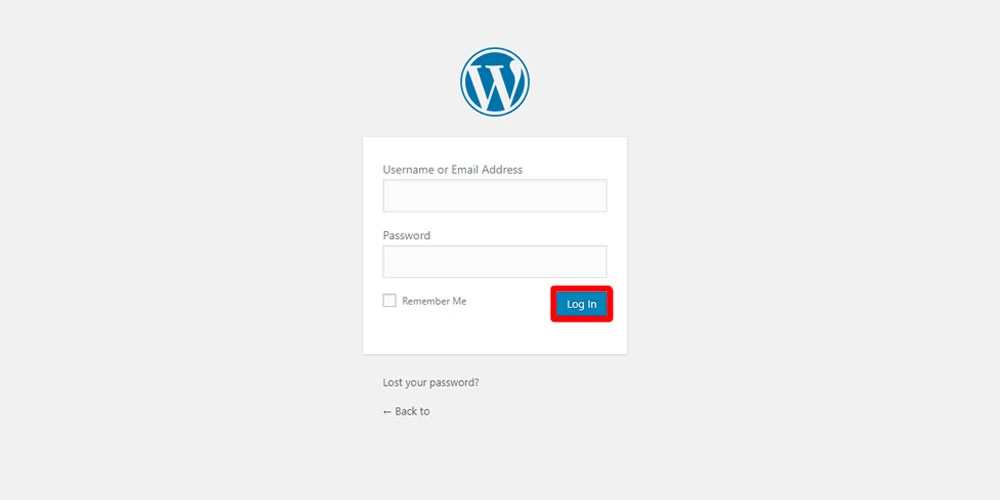
That’s it, your local WordPress site is live on your own computer. Click Log In, enter the username and password you just created, and you’ll land on your WordPress dashboard, ready to start building.
Common problems and how to fix them
Apache won’t start. Something else is using port 80, usually Skype or IIS. Close the conflicting app, or open XAMPP’s Config next to Apache and change the port to 8080.
Error establishing a database connection. Double check the database name matches exactly what you created in phpMyAdmin, and make sure MySQL is still running in the XAMPP Control Panel.
Maximum execution time exceeded when installing a theme or plugin. This is a common one once your site is up and running. Open the XAMPP folder, go to the etc subfolder, and edit php.ini. Find max_execution_time and increase the number, then restart Apache.
Blank white screen after finishing setup. Usually a plugin or theme conflict. Rename the wp-content/plugins folder temporarily through your file explorer, reload the site, and re-enable plugins one at a time to find the cause.
Frequently Asked Questions
Why does WordPress ask for "root" as the username with no password?
That's the default MySQL account XAMPP sets up for local development. It's fine to leave it this way on your own computer since nobody outside your machine can access it. You'd only need a proper username and password if this were a live, public server.
Can I install WordPress on XAMPP on a Mac?
Yes. The steps are almost identical, you just download the Mac version of XAMPP and the htdocs folder is located inside the Applications/XAMPP folder instead of C:\xampp.
Do I need an internet connection to use my local WordPress site?
No, once XAMPP and WordPress are installed, everything runs on your own computer. You only need internet to download things or to install plugins and themes from the WordPress directory.
How do I move my local site to a live server later?
You'll need to export your database from phpMyAdmin and copy your WordPress files over to your hosting account, then update the database connection details. A migration plugin makes this a lot easier than doing it by hand.
Is XAMPP the only option for running WordPress locally?
No, tools like LocalWP are built specifically for WordPress and are a bit more beginner friendly. XAMPP is a good choice if you want more control or you're already comfortable with it, and it works for more than just WordPress if you ever need a general PHP environment.
Try it yourself
Now that your local site is up and running, it’s a good place to try out a couple of lightweight plugins before you ever touch a live site. If you want to test out login security without any risk, you can install the Login Captcha plugin or HSArticle Login Warden here first and see exactly how they work before adding them to your real website.